PiOS, like other flavors of Linux, has the capability to run CRON jobs in a few different ways. CRON jobs are scripts/programs that run on some kind of schedule/trigger (these are Scheduled Tasks in the Microsoft Windows world). They can be run as root or as an individual user (assuming the user has the correct permissions for whatever the script/program is trying to access). In this article we will:
- Create a backup script in BASH to backup your Documents directory.
- Make the backup script executable.
- Move our backup script into the appropriate location for a daily CRON job.
- Configure the CRON settings for the root/system to enable daily CRON jobs to run at a specific time.
- Reload the CRON service so new jobs are registered
Why do this?
Automation is one of the most useful things you can do, period. Manually performing easily scriptable work is inefficient and a waste of your time.
How To:
In this example, we start by creating a backup script. You can do this in multiple languages, but here we are using BASH.
- Navigate to your home directory.
- cd ~
- Create a new file.
- sudo vim backupscript
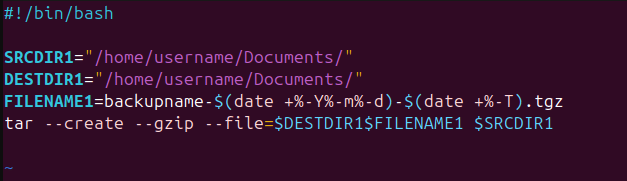
- Copy and paste the script below into the editor. We will go over each part. Replace username with your username.
#!/bin/bash

SRCDIR1="/home/username/Documents/"
DESTDIR1="/home/username/Documents/"
FILENAME1=backupname-$(date +%-Y%-m%-d)-$(date +%-T).tgz
tar --create --gzip --file=$DESTDIR1$FILENAME1 $SRCDIR1
Lets go over each line.
Line 1: Declares what kind of language the script is using. In this instance, it is BASH. This allows the system to read and call the appropriate program to run the script.
Line 3: Declares the source directory or file you want to backup. In this example, we are backing up our Documents directory. The trailing slash is important as it indicates we’re backing up a directory and not a file. You can replace this with a pathway to any file or directory.
Line 4: Declares the destination that the backup will be saved to. For simplicity’s sake we are saving the backup in the same directory, but this could be any location the system has access to, such as a network share or external hard drive. NOTE: The root user needs to have access to whatever location you are trying to save to. On the same system, this isn’t an issue. On a remote system or share, this may take additional configuration not covered in this guide.
Line 5: Declares the name of the backup file and includes date and time information as to when it was created. You can play around with the format or replace the “backupname” portion with your own name. This also adds the tarball (.tgz) file type to the backup file.
Line 6: Takes all of our previously defined variables and creates a tarball to save our files. For those who normally work in Microsoft Windows, think of a tarball as a ZIP file.
- Save your file once you have edited it to suit your needs.
- Press “shift + :”
- Enter “wq!” and press “enter”
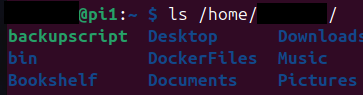
- You should now have a script in your home directory. Check in the terminal.
- ls /home/username/
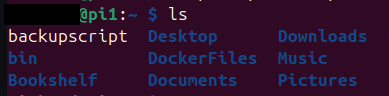
Making the script executable:
You may have noticed that your backupscript file shows as a different color in your terminal compared to other items. Currently, the white color of the file name shows that it isn’t executable. We need to make the file executable so it can be run as a script. To do this, we need to use chmod.
- Make the backupscript file executable.
- sudo chmod u+x /home/username/backupscript
- The file is now green, indicating that it is now executable. Try running it to make sure it is working as intended. Remember to replace “username” with your username in the command. If successful, you should see a .tgz file in your Documents directory.
- sudo /home/username/backupscript
Placing the Script:
Once the script is created and executable, it’s time to move it to location it will live and be run from. You can put the script almost anywhere depending on what user will be running it. In this example, we are going to move our “backupscript” into the daily CRON folder (/etc/cron.daily/). If you look in this directory, there will already be some scripts you can review.
- Move the script to the cron.daily directory.
- sudo mv /home/username/backupscript /etc/cron.daily/
Enabling Daily CRON Jobs
The cron,daily directory exists by default, but that doesn’t mean that scripts in it are run by default. You need to enable this.
- Edit the crontab file for the system to designate a run time, user to run as, command to run, and location to run it in. We’ll look at the file and discuss its contents below.
- sudo vim /etc/crontab
# /etc/crontab: system-wide crontab
# Unlike any other crontab you don't have to run the `crontab'
# command to install the new version when you edit this file
# and files in /etc/cron.d. These files also have username fields,
# that none of the other crontabs do.

SHELL=/bin/sh
PATH=/usr/local/sbin:/usr/local/bin:/sbin:/bin:/usr/sbin:/usr/bin

# Example of job definition:
# .---------------- minute (0 - 59)
# |  .------------- hour (0 - 23)
# |  |  .---------- day of month (1 - 31)
# |  |  |  .------- month (1 - 12) OR jan,feb,mar,apr ...
# |  |  |  |  .---- day of week (0 - 6) (Sunday=0 or 7) OR sun,mon,tue,wed,thu,fri,sat
# |  |  |  |  |
# *  *  *  *  * user-name command to be executed
17 *	* * *	root	cd / && run-parts --report /etc/cron.hourly
59 23 * * * root run-parts /etc/cron.daily
25 6	* * *	root	test -x /usr/sbin/anacron || { cd / && run-parts --report /etc/cron.daily; }
47 6	* * 7	root	test -x /usr/sbin/anacron || { cd / && run-parts --report /etc/cron.weekly; }
52 6	1 * *	root	test -x /usr/sbin/anacron || { cd / && run-parts --report /etc/cron.monthly; }
#
I know this looks messy in the editor, but if you copy it to a file it should display like the image below.
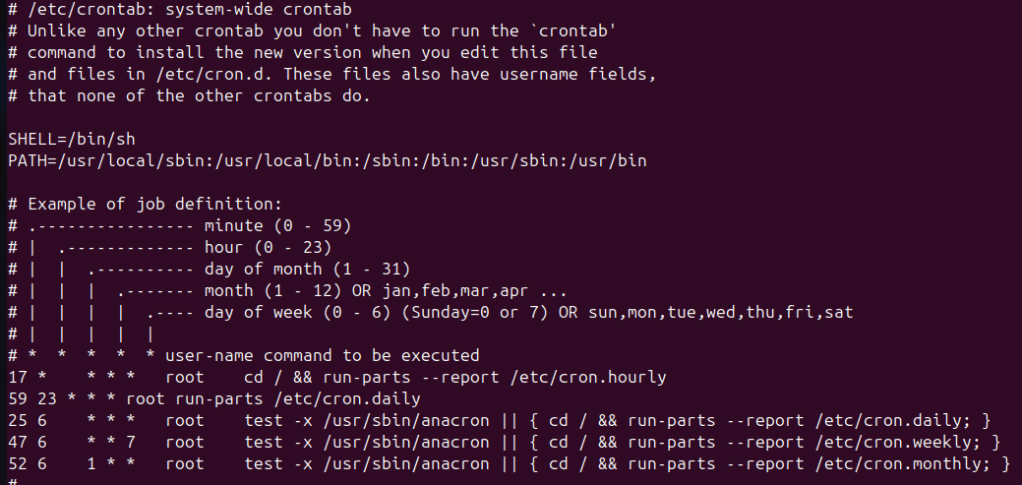
We are concerned with line 19, but take a minute to look at the file to see what it does.
Line 19 does a few things for us.
- 59 indicates the minute for the job to start.
- 23 indicates the hour for the job to start.
- The trailing asterisks are placeholders if you don’t want to use the remaining day of month/month/day of week options.
- root is the username that the job will execute under.
- run-parts is the command that runs all executable scripts within the specified directory.
- /etc/cron.daily/ is the directory the scripts are living in.
- Finish editing this file and save it.
- Press “esc”
- Press “shift + :”
- Type “wq!” and hit enter. The file should now be saved with your edits.
Reloading the CRON Service
You’ve created a script, placed it, and configured when you want the job to run. Now you need to restart the CRON service so these changes are recognized by the system
- Reload the CRON service.
- sudo service cron reload
For testing, I set my job start time to a few minutes from now and wait for it to execute. Once I know it’s working, I change the start time to something I want long term and reload the service.